Is your external backup hard drive full of Time Machine backup data? In last week’s Tech Tip, we talked about how Time Machine automatically deletes your oldest backups to make room for new backups. Time Machine typically does this, but I’ve seen it misbehave also. Alternatively, you might want to manually delete some of your old Time Machine backups to free up space on the external hard drive for some other use. In any case, here are instructions on how to manually delete some Time Machine backups.
On your Mac’s Desktop, double-click the icon of the external hard drive that stores your Time Machine backup data.
You’ll see a folder with the curious name of Backups.backupdb. Open this folder.
Inside you’ll see a separate folder for each Macintosh computer that is backed up to this drive. If you only backup one Mac, then you’ll only see one folder. The folder is typically named something like Susan’s iMac. Open the folder containing the backups you want to delete.
Wait for the contents to be displayed. It could take a minute. Eventually, you’ll see a list of folders whose names are comprised of date and time stamps. Each of these folders contains backup data created by Time Machine.
Select one of more of these folders, typically the oldest ones, and drag them to the Trash icon on your Dock.
Empty the Trash by going to the Finder menu and selecting Empty Trash.
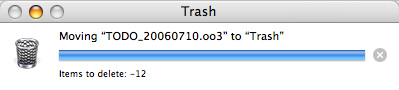
Sit back and wait while the Trash is emptied. You’ll be surprised how long this process takes. An even bigger surprise is that the status messages will indicate that the number of items to be deleted is a negative number. Of course this is illogical, but it will be displayed. Don’t worry about it. The deletion will eventually finish.